Upgrading a laptop SSD is mainly about matching your laptop's interface (2.5" SATA or M.2 NVMe), then migrating Windows safely and enabling the right BIOS/UEFI settings. Choose SATA for widest compatibility and predictable thermals; choose NVMe for higher responsiveness if your laptop supports it. Back up first, then clone or reinstall, validate performance, and fix firmware/driver bottlenecks.
Upgrade at a Glance: SATA vs NVMe
- Best compatibility: 2.5" SATA SSD (works in most laptops with a SATA bay).
- Best speed ceiling: M.2 NVMe SSD (only if your laptop has an NVMe-capable M.2 slot).
- Biggest risk: buying the wrong M.2 type (SATA M.2 vs NVMe M.2) or wrong key length (2242/2260/2280).
- Smoothest migration: cloning when the old drive is healthy; clean install when errors/BitLocker/corruption exist.
- Most common "slow NVMe" cause: slot wired for PCIe x2, older BIOS, wrong power settings, or thermal throttling.
Understanding SATA vs NVMe: Performance, Latency and Compatibility
If your goal is a noticeable everyday boost (boot time, app launches, swapping), both SATA and NVMe can feel fast; NVMe mainly helps under heavier parallel I/O (large builds, big file ops, multiple apps). The practical question behind SSD SATA vs NVMe ต่างกันยังไง ซื้อแบบไหนดี is compatibility: many laptops physically accept M.2 but only support SATA M.2, not NVMe.
| Aspect | 2.5" SATA SSD | M.2 NVMe SSD |
|---|---|---|
| Physical form | 2.5" drive + SATA cable/caddy | M.2 stick (common length 2280) |
| Interface/protocol | SATA / AHCI | PCIe / NVMe |
| Real-world feel | Large jump from HDD; stable for everyday use | More responsive under heavier multitasking and large transfers |
| Compatibility risk | Low (if you have a SATA bay) | Medium-high (slot may be SATA-only, PCIe lanes limited, or BIOS old) |
| Thermals | Typically easy to cool | Can throttle in thin laptops without airflow |
| When NOT worth it | If you already have a decent SATA SSD and your workloads are light | If your laptop doesn't support NVMe, has poor cooling, or you rely on maximum battery life consistency |
When you should not upgrade (quick filters):
- Your laptop storage is soldered (no replaceable SSD).
- You cannot disable BitLocker/device encryption and don't have the recovery key.
- The existing disk is failing hard (frequent freezes, SMART warnings) and you need data recovery first.
- The laptop has only one slot and you cannot connect the new SSD externally for cloning.
Inspect Your Laptop: Physical Fit, Interface Limits and Firmware Checks
Before you compare อัปเกรด SSD โน้ตบุ๊ก ราคา, confirm what your laptop can actually use. Model listings and even some manuals can be vague, so verify physically and in firmware/OS.
What you need (tools, access, and prerequisites)
- Precision screwdriver set (typically Phillips #0/#00); plastic pry tool.
- ESD safety: at least touch grounded metal; avoid carpet; unplug charger.
- Backup target: external HDD/SSD or cloud storage.
- For cloning: M.2 NVMe USB enclosure (if upgrading to NVMe) or SATA-to-USB adapter (if upgrading to 2.5" SATA).
- Windows admin access; BitLocker recovery key if encryption is enabled.
- Bootable installer USB (Windows) for fallback clean install.
Risk-aware limitations (read before buying or opening)
- Wrong M.2 type: an M.2 slot may accept only SATA M.2 or only NVMe; the drive may fit but not work.
- Single-slot cloning constraint: if there's only one internal slot, you must clone via USB enclosure or do a clean install.
- Thermal throttling: fast NVMe drives can slow down in thin laptops; performance may be inconsistent under sustained load.
- Firmware lock-in: some OEM BIOS versions have limited NVMe support until updated.
- Warranty risk: opening the bottom cover may affect warranty terms; check your brand policy.
Compatibility checks (fast and reliable)
- Identify current drive and interface in Windows. Open Device Manager → Disk drives and note the model; in Task Manager → Performance → Disk, Windows often labels NVMe vs SATA.
- Check for an M.2 slot and its key/length. If you can open the back cover, read the standoff position: 2242/2260/2280. Also note keying (most NVMe are M-key).
- Look for SATA bay/cable/caddy. Some laptops have a 2.5" bay but require a proprietary SATA ribbon or caddy.
- Verify BIOS/UEFI storage mode and boot mode. You want UEFI boot. Avoid switching RAID/AHCI casually-do it only with a plan (see settings section).
- Plan for external connection if cloning. For the query ย้าย Windows ลง SSD โน้ตบุ๊ก โคลนดิสก์ ราคา, the key factor is whether you can attach the new SSD via USB reliably.
Selecting the Right Drive: Capacity, Endurance, Controller and Brand Risks
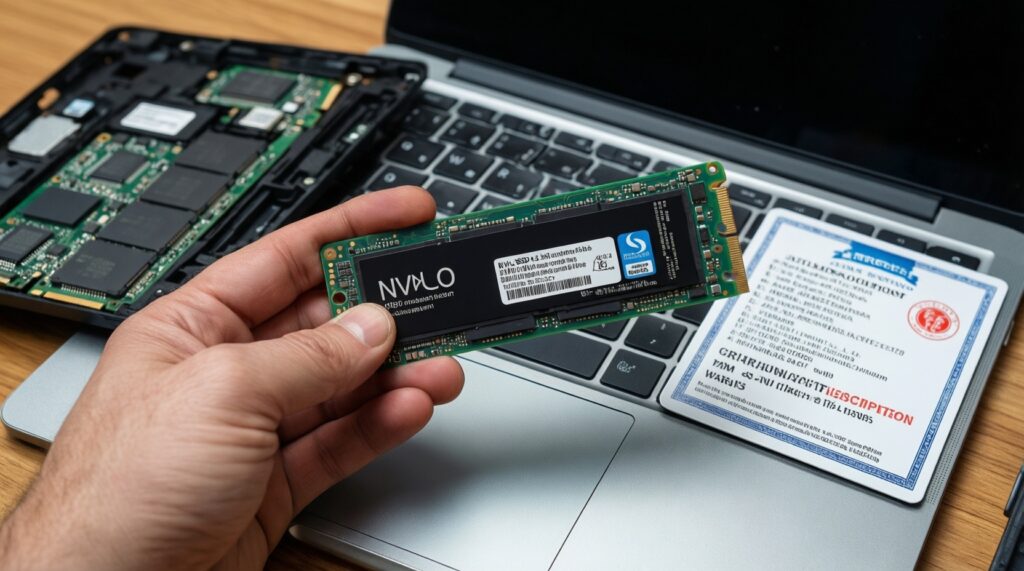
If you're asking SSD NVMe M.2 สำหรับโน้ตบุ๊ก ยี่ห้อไหนดี, start with interface fit and thermal behavior, then choose a reputable line with stable firmware and clear warranty terms in Thailand. Avoid unknown "no-name" SSDs with unclear controllers or frequently changing components.
-
Step 1: Decide SATA vs NVMe based on proven laptop support.
Buy SATA if you have a 2.5" bay or your M.2 slot is SATA-only. Buy NVMe only when the laptop clearly supports NVMe boot and the slot is PCIe/NVMe capable.- Conservative path: choose SATA if you cannot confirm NVMe support.
- Aggressive path: NVMe if you confirm NVMe in manual/BIOS and you can manage thermals.
-
Step 2: Confirm physical size (especially M.2 length) and clearance.
Match 2242/2260/2280 and ensure there's no shield/board blocking thicker drives. If your laptop needs a heatsink, ensure it fits the bottom cover. -
Step 3: Choose capacity based on your actual used space + safety headroom.
For cloning, the new SSD must be at least as large as the used data (and sometimes the old disk size, depending on layout). Keep free space after migration to avoid slowdowns.- Check used space: Settings → System → Storage.
- Reduce used space before cloning: uninstall unused apps, move large files.
-
Step 4: Prefer stable, mainstream SSD lines with clear specs and firmware support.
In practice, look for consistent model numbers, official tools, and easy warranty handling locally. Avoid drives with unclear NAND type or frequently changing controllers under the same SKU. -
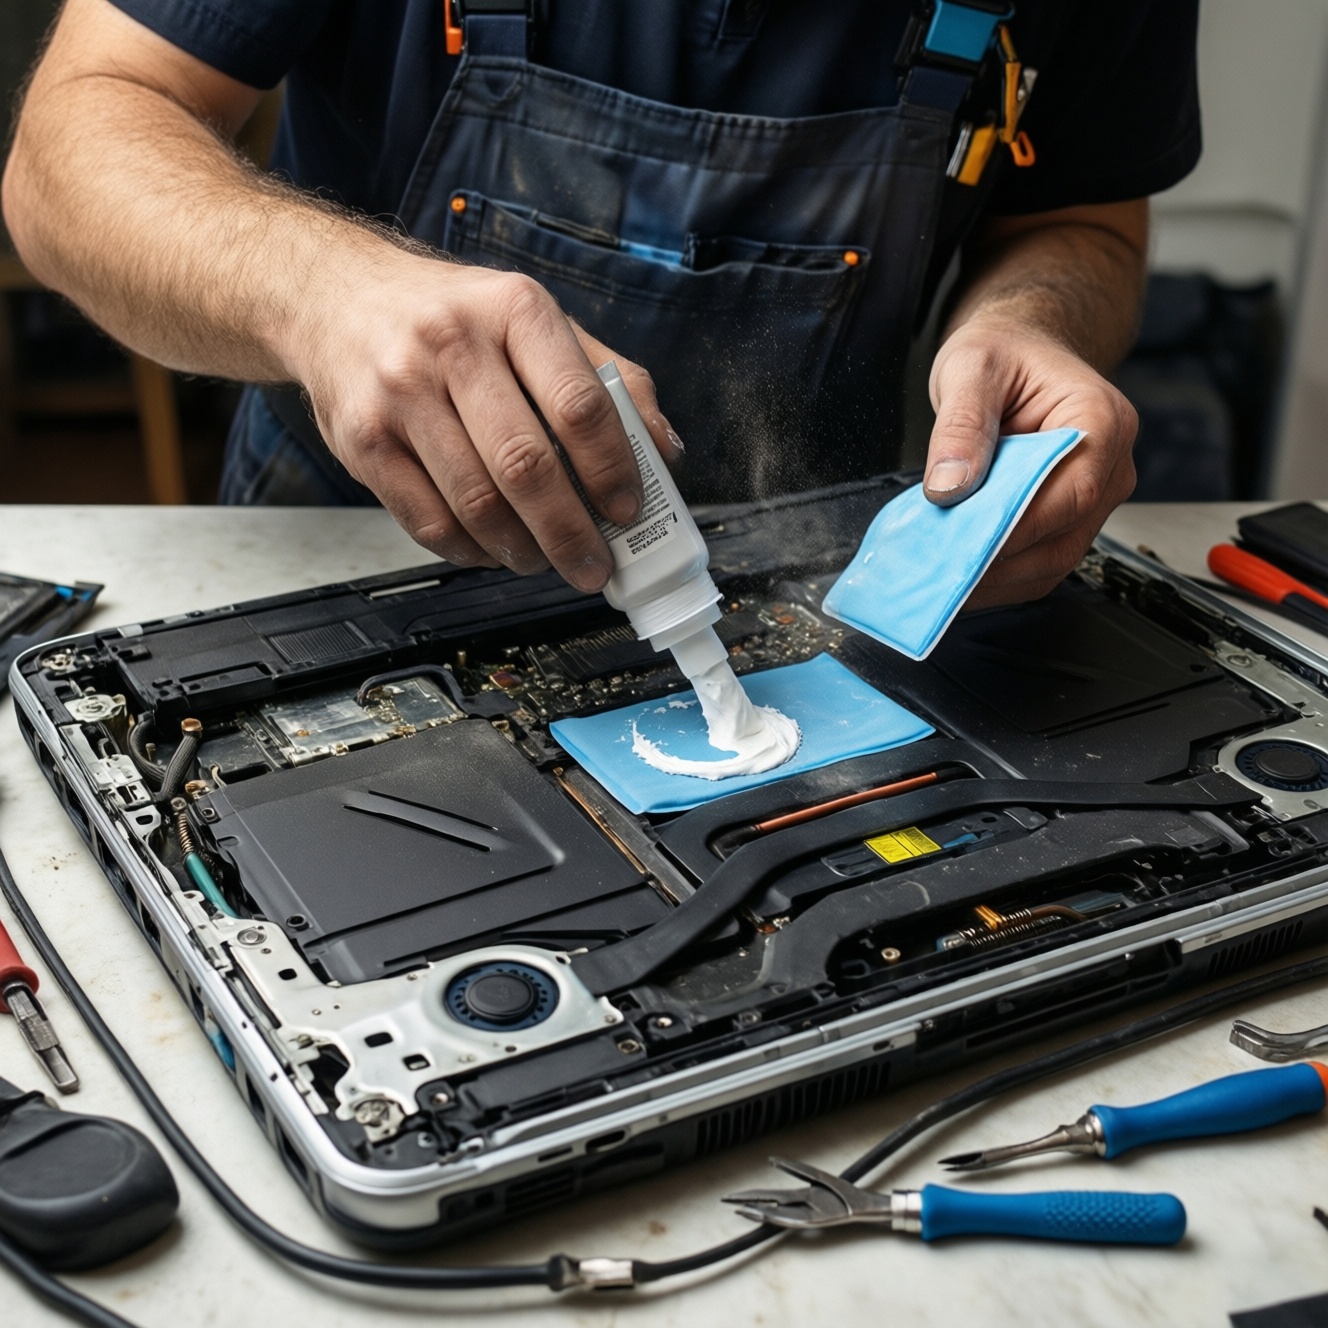
Step 5: Manage thermals and power behavior (NVMe).
If your laptop is thin, prioritize an NVMe known for lower sustained power, or accept that peak benchmarks may throttle. A simple thermal pad to the chassis can help if there is safe contact and no pressure on the board. -
Step 6: Plan your migration method before purchase.
If you only have one internal slot, include the cost of a USB enclosure/adapter in your budget-this is often what changes the real ติดตั้ง SSD โน้ตบุ๊ก พร้อมลง Windows ราคา outcome.
Migration Strategies: Cloning, Image Restore and Clean Install Workflows
Choose the workflow that matches your risk tolerance and time. Cloning is fastest; clean install is cleanest; image restore is reliable if you already maintain images.
| Approach | Best for | Risks | Practical tools |
|---|---|---|---|
| Clone (disk-to-disk) | Quick swap with same OS/apps | Copies existing problems (corruption, bloat); BitLocker complications | Macrium Reflect, AOMEI Backupper, Clonezilla |
| Image restore | You already have a clean system image | Requires prior planning; driver mismatch if image is old | Macrium, Windows Backup images (where applicable) |
| Clean install | Best stability; fixing long-term OS issues | Reinstall apps/drivers; data restore needed | Windows Media Creation Tool, OEM recovery |
Cloning workflow (safe baseline)
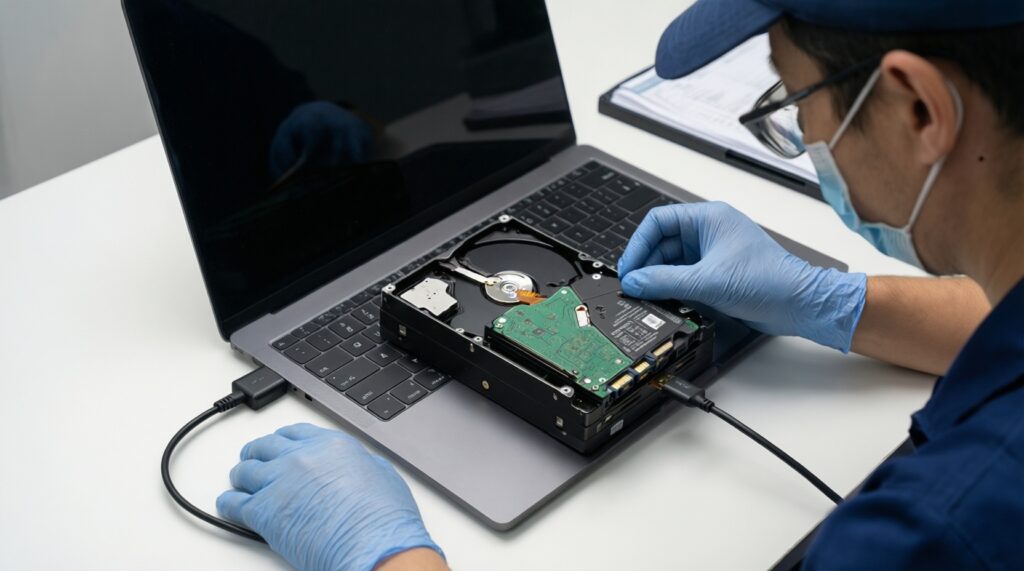
- Back up critical files separately (don't rely on cloning as your only backup).
- Suspend/turn off BitLocker or Device Encryption; save the recovery key.
- Connect the new SSD via USB enclosure/adapter.
- Clone all required partitions (EFI System + MSR + Windows + Recovery) to the new SSD.
- Shut down completely (no sleep/hibernate), then replace the internal drive.
- First boot: enter BIOS/UEFI and confirm the new SSD is the first boot device.
Clean install workflow (when cloning is risky)
- Back up data; export browser passwords; note app licenses.
- Create Windows installer USB; download Wi‑Fi/LAN driver if your laptop needs it.
- Swap the SSD internally.
- Install Windows in UEFI mode; delete old partitions on the new SSD during setup if appropriate.
- Install chipset/storage drivers, then Windows Update, then OEM utilities as needed.
Post-migration verification checklist (do this every time)
- Windows boots without repeated automatic repair loops.
- Disk is detected correctly in Disk Management and shows expected capacity.
- TRIM is enabled (Windows Admin Terminal):
fsutil behavior query DisableDeleteNotify(0 means TRIM enabled). - Partition alignment looks normal (most cloning tools handle this automatically).
- BitLocker re-enabled (if you use it) and recovery key stored safely.
- Enough free space remains for updates and paging.
- Hibernation and sleep behave normally (test once).
- Your external backup is still readable (spot-check a few files).
Firmware, BIOS/UEFI and OS Settings to Unlock Throughput
These are the mistakes that most often make an upgraded SSD feel slower than expected.
- Outdated BIOS/UEFI. Update from the laptop vendor before major storage changes, ideally while the old drive still boots reliably.
- Wrong boot mode. Using Legacy/CSM can complicate NVMe boot; prefer pure UEFI.
- Switching RAID/AHCI without preparing Windows. Changing this setting can cause boot failure; only do it with a driver/registry plan or a clean install.
- BitLocker left active during cloning. Clone after decrypting/suspending to avoid boot/key issues.
- NVMe power management too aggressive. In Windows Power Plan, test Balanced vs High performance; for troubleshooting you can set PCIe Link State Power Management to Off.
- Old chipset/storage drivers. Update via Windows Update and OEM support page; for many platforms the chipset package matters more than the SSD brand utility.
- Thermal throttling mistaken for "bad SSD". If speed drops after a short burst, improve airflow, use a thermal pad if safe, or choose a cooler-running model.
- Too many background tasks after migration. Let Windows finish indexing/updates before judging performance.
Useful commands (Windows)
- Check TRIM:
fsutil behavior query DisableDeleteNotify - Run a quick disk check:
chkdsk C: /scan - System file check (if stability issues):
sfc /scannow - Repair component store (if needed):
DISM /Online /Cleanup-Image /RestoreHealth
Validation, Benchmarks and Common Post‑Upgrade Failures
Validate with both a benchmark and real tasks (large copy, reboot, app load). If results are inconsistent, isolate whether the limit is the SSD, the slot, thermals, or firmware.
Benchmarks and checks you can run
- CrystalDiskMark for quick throughput comparison (run after the system is idle).
- CrystalDiskInfo to check SMART health and temperatures.
- Windows Task Manager → Performance to watch disk active time and queue during a file copy.
Common failures and what to do first
- No boot device found: confirm UEFI boot, correct boot order, and that the EFI partition was cloned.
- SSD not detected: reseat M.2, confirm correct standoff length, update BIOS, confirm the slot supports NVMe (not SATA-only).
- Slower than expected NVMe: check lane limitation (some slots are x2), update chipset drivers, check temperatures and power settings.
- Random freezes: update SSD firmware (if available), check for overheating, run
chkdsk, and test RAM if issues persist.
Alternatives when an SSD upgrade is not the best next step
- External SSD for projects/scratch. Useful when internal storage is soldered or warranty-sensitive; great for moving large files and media work.
- Add RAM first. If you constantly hit memory limits, extra RAM can reduce paging and may feel faster than switching SATA to NVMe.
- Battery/thermal service. If the laptop is throttling due to heat, cleaning the fan and replacing thermal paste can improve sustained performance more than a faster SSD.
- Professional service for full package. If you prefer a guaranteed outcome for ติดตั้ง SSD โน้ตบุ๊ก พร้อมลง Windows ราคา, pay for installation with OS setup-especially when encryption, OEM recovery, or data safety is critical.
Typical Concerns and Practical Answers
How do I know whether my M.2 slot supports NVMe or only SATA?
Check the laptop service manual/spec sheet and confirm in BIOS/UEFI or by the original SSD model. If you see an existing NVMe drive model or BIOS lists NVMe, it's NVMe-capable; if unsure, assume SATA-only to avoid a non-booting purchase.
Will NVMe always feel faster than SATA in daily use?
Not always. For boot and app launching, both are fast; NVMe shines more with heavy multitasking and large file transfers, and it can throttle in thin laptops.
Can I clone Windows if my laptop has only one internal slot?
Yes, if you use a USB enclosure/adapter for the new SSD, then swap drives. Without an external connection, a clean install is usually simpler.
Do I need to disable BitLocker before cloning?
It's strongly recommended to suspend or decrypt BitLocker before cloning to avoid boot and recovery-key problems. Keep the recovery key saved offline before you start.
What's the safest way to avoid losing data during the upgrade?
Do a separate file backup first, then clone or install. Treat cloning as a migration method, not as your only backup.
Why does my new NVMe benchmark lower than reviews?
Your laptop may limit PCIe lanes, run an older BIOS, or throttle due to temperature/power settings. Validate thermals and chipset drivers before concluding the SSD is defective.
How should I think about cost in Thailand for service vs DIY?
For อัปเกรด SSD โน้ตบุ๊ก ราคา, the real cost includes tools, USB enclosure (if needed), and time. If you also want ย้าย Windows ลง SSD โน้ตบุ๊ก โคลนดิสก์ ราคา handled end-to-end, service pricing often reflects data-risk responsibility, not just the SSD itself.