
A post-upgrade or post-repair validation checklist is a repeatable set of boot, storage, memory, load, and thermal tests that confirms your PC is stable under stress, not just able to start. For intermediate users in Thailand, the safest path is: verify power and peripherals, read SMART, run memtest, do staged CPU/GPU stress testing, and log CPU/GPU temperatures.
Post-upgrade validation checklist - quick summary
- Cold boot twice, confirm BIOS/UEFI sees all devices, and verify USB/network/audio quickly.
- Check disk SMART (baseline + self-test); stop if reallocated/pending sectors grow.
- Run a memory test (memtest) before long OS-level troubleshooting.
- Stress CPU and GPU separately, then together; watch for errors, WHEA, driver resets.
- Log CPU/GPU temperatures during load; confirm no throttling or sudden spikes.
- Write down results and apply a go/no-go rule before returning the machine to a user/client.
Initial boot, power and peripheral verification
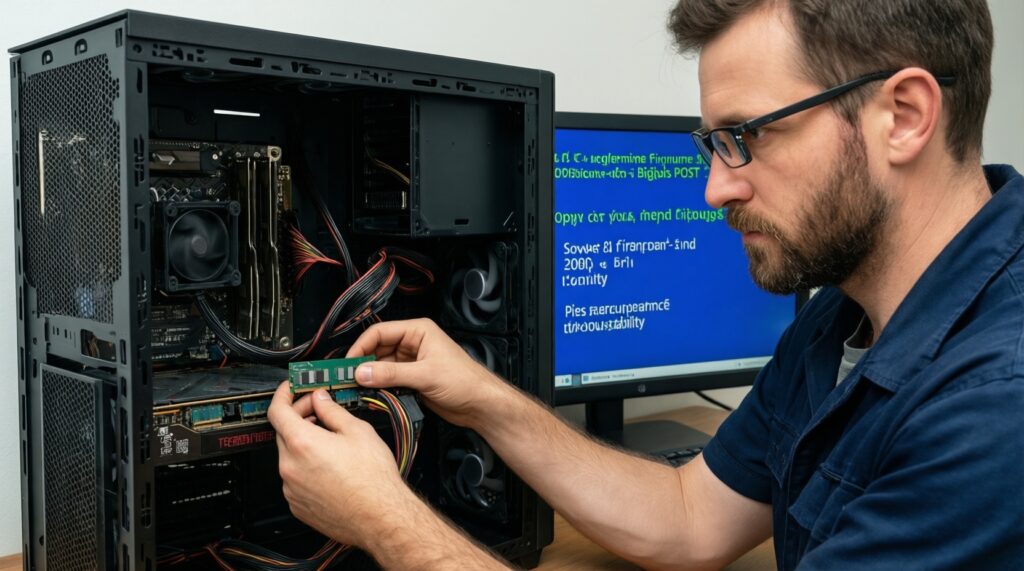
Goal: confirm the upgrade/repair didn't introduce basic electrical, seating, or firmware-level issues. This step prevents wasting time on deep tests when the problem is simply a loose EPS/PCIe cable, a wrong RAM slot choice, or an unstable PSU rail.
What it covers: power delivery, POST behavior, device enumeration (CPU/RAM/GPU/storage), and "must-have" peripherals. It does not prove stability under sustained load; it only proves the system reaches a known-good baseline reliably.
Tools: BIOS/UEFI screen, Windows Event Viewer, Device Manager, and a quick peripheral check. In a service context (ร้านซ่อมคอมทดสอบเครื่องหลังอัปเกรด), this is the minimum acceptance gate before running long stress tests.
-
Procedure: power off fully, then cold boot twice.
- Pass: consistent POST time, no boot loops, no random power cuts.
- Fail: power cycling, "new CPU installed" every boot, CMOS resets.
-
Procedure: in BIOS/UEFI, confirm CPU model, RAM size/speed, and all drives detected.
- Pass: correct totals; XMP/EXPO only if you intend to validate it.
- Fail: missing DIMM/channel, SATA device absent, GPU not detected.
-
Procedure: OS quick checks: network link, audio output, and 2-3 USB ports.
- Pass: stable connection, no device disconnect/reconnect loops.
- Fail: repeated USB resets, Wi‑Fi drops, audio crackling under idle.
Representative Windows checks:
wmic memorychip get devicelocator,capacity,speed
wmic diskdrive get model,status
pnputil /enum-devices /connected
Expected signal: all modules/drives present, no obvious "Unknown device", and no immediate disconnect storms.
Storage health: SMART data checks and interpretation
Goal: ensure your storage is healthy enough for validation to be meaningful (bad drives can masquerade as "CPU/RAM instability"). This is the practical core of โปรแกรมเช็คสุขภาพฮาร์ดดิสก์ SMART workflows.
How it works (mechanics):
- SMART exposes drive-maintained counters (wear, errors, reallocated sectors) plus self-test logs.
- You read a baseline, run a self-test, then re-read to see if critical attributes changed.
- NVMe exposes health via log pages (percentage used, media errors), not identical to SATA SMART fields.
- A "PASSED" overall status is not enough; you look for trend changes and non-zero critical counters.
- Short self-tests catch obvious media/controller issues; long tests are better after major repair.
Tools: smartmontools (smartctl) on Windows/Linux, vendor tools for NVMe if needed.
Procedure + commands:
-
Identify disk:
smartctl --scan -
Read baseline:
smartctl -a /dev/sda smartctl -a /dev/nvme0 -
Run self-test:
smartctl -t short /dev/sda smartctl -t long /dev/sda -
Review results:
smartctl -l selftest /dev/sda
smartctl -a /dev/sda
Pass criteria (practical): self-test completes without read failures; critical counters are stable (not increasing between baseline and post-test).
Fail criteria: new read/uncorrectable errors, self-test aborts, or critical counters increasing after a test (treat as stop-the-line and replace/clone before further validation).
Memory integrity: memtest setup and failure signs
Goal: verify RAM stability independent of OS/drivers. A single-bit error can look like "random app crashes", "GPU driver issues", or corrupted installations. This is why memtest โปรแกรมทดสอบแรม is usually run early, before multi-hour CPU/GPU stress.
Where it's used (typical scenarios):
- After adding/reseating DIMMs (new kit, mixed kits, or moving to different slots/channels).
- After enabling XMP/EXPO or tightening timings/undervolting memory controller.
- After a motherboard/CPU swap where the IMC behavior changes.
- After unexplained BSODs or installation corruption right after repair/upgrade.
- Before returning a client build from a shop workflow (ร้านซ่อมคอมทดสอบเครื่องหลังอัปเกรด) to reduce "comes back tomorrow" incidents.
Tools: bootable Memtest86 or an equivalent; keep it on a known-good USB drive.
Procedure:
- Reset memory settings to a known baseline (JEDEC) if you're diagnosing instability.
- Boot memtest from USB; run enough coverage to catch intermittent faults (longer is better than "one quick run").
- If errors appear, stop and isolate: test one stick at a time, then one slot/channel at a time.
Pass criteria: zero errors across the run(s) you defined for acceptance.
Fail signs: any error count > 0, errors concentrated in one address range (often module-related), or errors only when XMP/EXPO is enabled (often settings/IMC-related).
Stress-test methodology for CPU and GPU stability
Goal: prove stability under sustained load and transient spikes. This is where "boots fine" systems fail. In Thai search intent, this maps to โปรแกรม stress test คอมพิวเตอร์ for CPU/GPU/RAM/PSU validation.
Convenience vs risk: choosing what to run first
- Most convenient to implement: OS-level stress tests (easy to start/stop, easy logs). Risk: OS/driver issues can mask hardware root cause; GPU drivers may reset and confuse results.
- Lowest ambiguity: component-isolated tests (CPU-only, GPU-only, then combined). Risk: takes longer, and combined tests can push PSU/VRM harder.
- Highest signal for "shop acceptance": staged approach with documented pass/fail criteria. Risk: requires discipline to keep settings consistent across machines.
Procedural approach (recommended staging)
-
CPU-only: run a CPU stress tool (e.g., Prime95 small FFTs, y-cruncher, OCCT CPU).
- Pass: no errors, no WHEA, no throttling beyond expected.
- Fail: rounding errors, WHEA-Logger, sudden reboots.
-
GPU-only: run a GPU load (e.g., 3DMark stress loop, Unigine, OCCT GPU).
- Pass: no driver resets, no artifacting, stable clocks within cooling limits.
- Fail: TDR/driver crash, black screen, artifacts.
-
Combined load: run CPU+GPU together (OCCT combined, or CPU stress + GPU stress simultaneously).
- Pass: stable under peak combined draw; no shutdowns.
- Fail: PSU protections triggering, VRM overheating, random restarts.
Representative Windows checks during/after a run:
wevtutil qe System /q:"*[System[(EventID=17 or EventID=18 or EventID=19) and Provider[@Name='Microsoft-Windows-WHEA-Logger']]]" /f:text /c:20
wevtutil qe System /q:"*[System[Provider[@Name='Display']]]" /f:text /c:20
Limitations to state upfront:
- Stress tests prove stability only for the tested configuration (BIOS version, drivers, power limits, ambient temperature).
- Passing a short run doesn't guarantee long-session stability (gaming/encoding) if thermals saturate later.
- Some failures are workload-specific; include at least one "real" workload relevant to the user (game, render, compile) after synthetic tests.
Thermal monitoring: sensors, logging and safe thresholds
Goal: detect overheating, throttling, and cooling mis-mounts early, with evidence. This aligns with โปรแกรมเช็คอุณหภูมิ CPU GPU usage: you're not only reading a number, you're confirming stability trends under load.
Tools: HWiNFO (sensors + logging), GPU-Z, vendor overlays, Linux lm-sensors.
Typical mistakes and myths:
- Watching only peak temperature: throttling flags, power limits, and sustained temperature are often more diagnostic than a single max value.
- Trusting one sensor blindly: compare CPU package vs core, GPU edge vs hotspot (if available), and verify fan RPM response.
- No logging: without a log you can't correlate a crash with a thermal spike or a fan curve issue.
- Ignoring ambient and case airflow changes: a closed panel can change behavior versus an open test bench.
- Assuming "below some universal number" is safe: safe operating ranges vary by CPU/GPU model; use vendor guidance and watch for throttling indicators rather than copying a single threshold.
Procedure:
- Start sensor logging before the stress test (CSV is enough).
- Run CPU-only then GPU-only tests; compare thermal curves and fan behavior.
- Check for throttling indicators (thermal/power/current limit) during the hottest part of the run.
Pass criteria: temperatures stabilize (no runaway), no throttling that causes instability, and fan control behaves predictably.
Incident logging, result review and remediation checklist

Goal: turn raw test output into a decision: accept, rework, or replace. This reduces repeat visits and helps standardize results across machines and technicians.
Mini-case: random reboot after GPU upgrade
Observed: system boots, idles fine, reboots under combined CPU+GPU load.
Method: isolate and log.
# Pseudocode-style workflow (human process)
baseline = record(BIOS_version, RAM_profile, GPU_driver, PSU_model)
run(CPU_only, log_temps, log_events)
if WHEA_errors: downclock_RAM_or_disable_XMP(); retest

run(GPU_only, log_temps, log_driver_events)
if driver_resets_or_artifacts: clean_driver_install(); check_PCIe_power_cables(); retest

run(Combined_load, log_temps, log_power_limits)
if instant_reboot_without_logs: suspect_PSU_or_short; swap_PSU_or_reseat_all_power; retest
Representative evidence to capture:
- Event Viewer excerpts (WHEA-Logger, Display driver resets).
- SMART before/after (so storage is ruled in/out).
- Memtest result screenshot/log (to stop "maybe RAM" debates).
- Temperature log around failure time.
Go/no-go self-check (use this to close the job)
- No WHEA hardware errors and no unexpected reboots during staged CPU/GPU/combined load.
- SMART critical counters stable and self-tests completed without new errors.
- Memtest completed with zero errors at the intended RAM profile (JEDEC or XMP/EXPO).
- CPU/GPU temperature logs show stable behavior with no persistent throttling or fan control anomalies.
- All must-have peripherals work after multiple cold boots (especially storage and network).
Typical failure patterns and rapid fixes
Why does the system boot-loop or power off immediately after the upgrade?
Re-check EPS/CPU power and PCIe power seating, then clear CMOS and boot with minimal hardware (one RAM stick, no extra drives). If it stabilizes, add components back one at a time.
What should you do if SMART shows warnings but the PC seems stable?
Stop validation and protect data first: clone/backup, then run a SMART self-test and compare attribute changes. A "works today" drive can still corrupt installs and test results.
What does it mean if memtest reports errors only when XMP/EXPO is enabled?
Treat it as an unstable memory profile: lower frequency, increase memory-related voltages only within vendor guidance, or update BIOS. Validate again at the new settings.
How do you troubleshoot a GPU stress test black screen or driver reset?
Do a clean GPU driver reinstall and confirm PCIe power connectors are correct (no loose adapters). If it persists, test GPU-only in another system or reduce GPU power limit to diagnose PSU/VRM margin.
Why can a CPU stress test fail quickly when light usage seems fine?
Disable undervolt/overclock, confirm cooler mounting and fan curve, then re-run CPU-only testing. If errors remain at stock, suspect cooling/VRM or a defective CPU/motherboard.
How can temperatures look fine but performance still drops hard under load?
Check for throttling flags and power limits rather than focusing on peak temperature. Review logs for sustained thermal saturation or power-limit throttling and adjust cooling or power settings accordingly.
What usually causes combined CPU+GPU load to reboot the machine with no clear logs?
This often points to PSU protection triggering or a power short; inspect all power cabling and try a known-good PSU. Re-test combined load after each change.